&color=rgb(100%2C100%2C100)&link=https%3A%2F%2Fgithub.com%2Faserto-dev%2Ftopaz)
From RBAC to ABAC
Jan 20th, 2022
Roie Schwaber-Cohen
Authorization |
Integration

Role-Based Access Control (RBAC) is a method for restricting users from accessing protected resources. Resources are associated with permissions, and permissions and grouped into a set of distinct roles. Users are then assigned roles that correspond to their function in the organization. RBAC might not be sufficient to describe more nuanced scenarios where permissions are granted based on dynamic properties associated with a user.
Attribute-Based Access Control (ABAC) on the other hand, allows us to use any number of attributes a user may have to determine whether they have access to a particular resource or not. While roles give us a sense of what the user's function is in an organization, attributes give us a sense of who the user is and what properties are particular to them.
For example, some of these attributes could be a user's location, their IP address, the type of device they're using, their current department, the project they're working on, etc. Defining rules based on attributes that can change over time gives this authorization model a dynamic quality: the authorization decision will depend on the user's attributes' value at runtime.
With ABAC, we can define fine-grained rules that may include multiple user attributes. For example, we may want to allow a user to access a resource if they are a member of a specific department while working on a specific project and during a specific time period.
As we'll see in this tutorial, the dynamic behavior we can achieve with ABAC could be used to support a wide variety of use cases that couldn't be satisfied using RBAC alone. That said, we have to use ABAC judiciously, since it can increase the complexity of our authorization model and make it more difficult to maintain.
Prerequisites
To complete this tutorial, you'll need:
- An Aserto account (if you don't have one, sign up here!)
- A Netlify account (Netlify is awesome, and you can get an account for free!)
- Your favorite IDE
- We highly recommend you complete the PeopleFinder Quickstart before starting this tutorial. It will take you through the basic account setup in Aserto, and will introduce you to the basic concepts of Role-based Access Control (RBAC).
The scenario
Acmecorp (our imaginary company) has offices all over the world, with employees working on different projects. Each project has a particular set of security requirements that employees must adhere to.
In this scenario, we'll simulate two projects: Project Red and Project Blue. An employee must be assigned to the project they are working on in order to access any information related to it. Project Red requires that employees must be using an approved device, and Project Blue adds an additional requirement - for employees to be in an approved location in order to access protected resources.
For both projects, all employees are only allowed to access protected resources during working hours, depending on their current timezone.
To simulate this scenario, we created an application that leverages the Aserto Directory API to make updates to users' attributes. This will allow us to simulate different dynamic behaviors like users changing their location, the device they are using, the projects they're working on. We'll deploy this application to Netlify after setting up the Acmecorp IDP in our account and creating an ABAC policy in our tenant. Let's get started!
Add the Acmecorp IDP
In order to simulate the dynamic behavior of user attributes, we need to add the Acmecorp IDP to our Aserto account. Head on to the Aserto Console, select the "Connections" tab and click the "Add Connection" button.
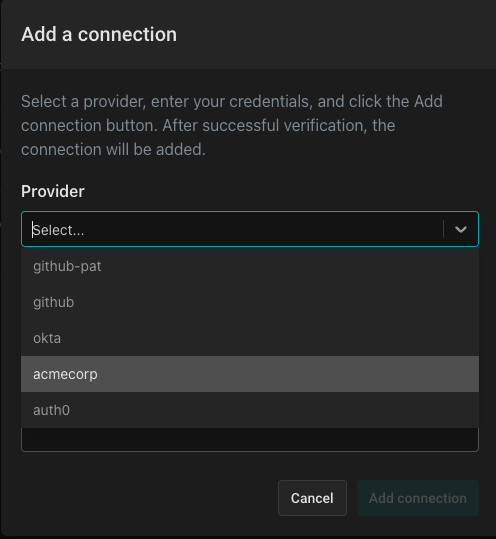
From the drop-down menu, select "Acmecorp"
Name the provider (you can choose whatever name you want) and give it a description.
Finally, click “Add connection”:
Create the policy
Click here to create a new policy.
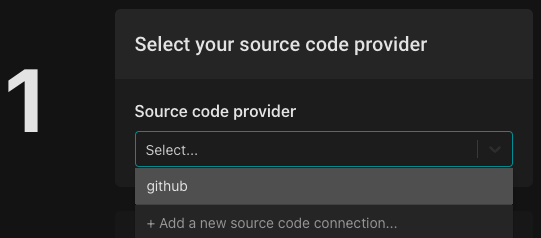
First select your source code provider. If you haven't set one up already, you can do so by clicking the "Add a new source code connection" in the dropdown. This will bring up a modal for adding a connection to a provider. Note that Aserto supports GitHub as a source code provider, but allows you to connect to it either over an OAuth2 flow, or using a Personal Access Token (PAT).
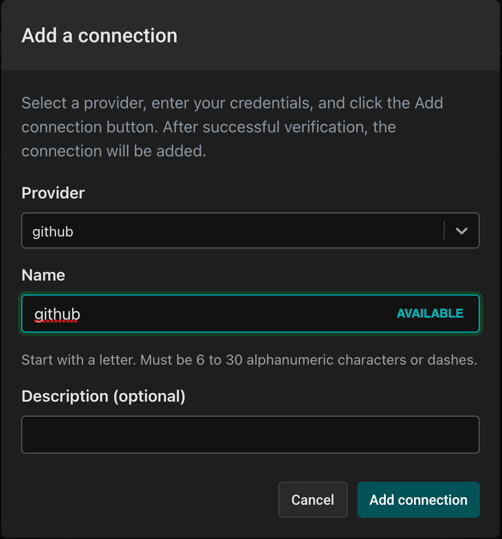
After you're done connecting your Github account (or if you previously connected it), select "github" as your Source code provider.
Next, you'll be asked to select an organization & repo. Select the “New (using template)” radio button, and select the "policy-template" template.
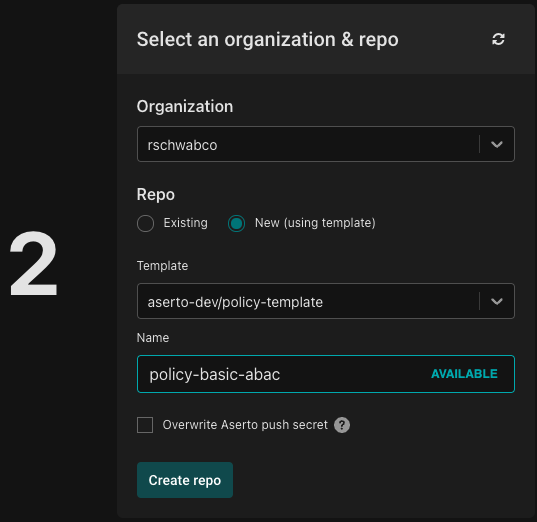
Name your policy repo "policy-basic-abac" and click "Create repo".
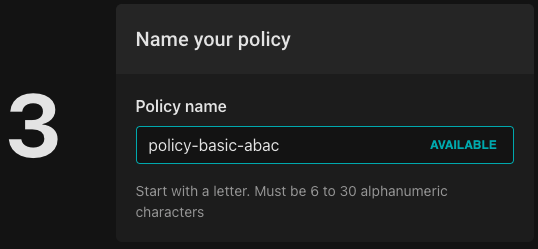
And finally click "Add policy":

Head to Github and open the newly created repository, and clone it.
git clone https://github.com/[your-organization]/policy-basic-abacBuild a reusable rule
We're going to create two policies that will simulate the two projects in Acmecorp - Project Red and Project blue. Both projects work with the same office management departments, which are responsible for determining working hours for all employees.
For that purpose, we'll create a package which will make that determination, and will be used by policies for both projects. We're going to use a couple of built-in Rego functions (time.now_ns() and time.clock()) to make this determination.
Under the src folder, we'll create a new file called office-management.rego, which will contain the following:
package officeManagement

import input.user.attributes.properties as user_props

isWorkingHoursWithTimezone {
	ns := time.now_ns()
	clock := time.clock([ns, user_props.timezone])
	clock[0] >= 8
	clock[0] < 17
}
The function time.clock([ns, timezone]) will return the current time in the timezone specified as an array, with the first element being the digits for the hour of the day. The timezone will be based on the user's properties that would be dynamically updated by the application. The clause checks that the hour of the day is between 8am and 5pm, and if so it will evaluate to true.
Create a data.json file
We'll introduce a new file under the src directory called data.json. This file will include two sections:
- Allowed Locations: the locations from which users are allowed to access a protected resource
- Allowed Devices: the devices users are allowed to use to access protected resources
This is what our data.json should look like:
{
  "allowedLocations": ["New York", "Auckland", "Tokyo"],
  "allowedDevices": ["MacBook", "PC", "iPhone"],
}
{
"allowedLocations": ["New York", "Auckland", "Tokyo"],
"allowedDevices": ["MacBook", "PC", "iPhone"],
}Create the policies
The first policy, for "Project Red" will take into account:
- Working hours - The policy will verify that the user is trying to access a resource during working hours, depending on their time zone.
- Device used: Our application will be able to simulate users using one of four types of devices: a MacBook, a PC, an iPhone and an Android device. Only the first three are going to be allowed.
The second policy, for "Project Blue" will take into account everything from the first policy but would be even more restrictive - it would also take into account:
- Location: The user will be able to be in one of known locations.
We'll start by renaming the file hello.rego to project-red.rego, and completely removing the contents of the file.
Then, we'll name the package to match the root, method and path of the application route we're going to protect:
package policyabac.GET.api.projects.redThen, we'll add a couple of import statements:
import data.officeManagement.isWorkingHoursWithTimezone
import input.user.attributes.properties as user_props
These will allow us to:
- Use the
isWorkingHoursWithTimezonefunction to determine whether the user is trying to access a resource during working hours. - reference roles and properties that are nested deep in the input object using the alias
user_props.
In order to have a policy that is "closed" by default, we'll set the default values for the allowed, visible and enabled decision to false:
default allowed = false

default visible = false

default enabled = false
Next, we're going define a couple of clauses that will resolve whether the user is using an approved device and whether they are in an approved location.
deviceAllowed {
	user_props.device == data.allowedDevices[_]
}
The following clause demonstrates the fine-grained nature of our ABAC policy. It takes into account all the attributes we resolved so far, and combines them into a decision that will determined if the user is allowed to access the resource depending on:
- whether the user is assigned to the "red" project and
- whether they are using an allowed device and
- whether the request is being sent during working hours
allowed {
	user_props.project == "red"
	isWorkingHoursWithTimezone
	deviceAllowed
}
The visible and enabled decisions below control the behavior of a button in the application that will be displayed to the user. Regardless of whether the user is using an approved device or whether they are trying to access the resource during working hours - as long as they are assigned to "Project Red" the button for accessing protected resources relating to their project will be visible. If they are trying to use the button outside of working hours, the button will be disabled.
visible {
	user_props.project == "red"
}

enabled {
	user_props.project == "red"
	isWorkingHoursWithTimezone
}
The final policy for "Project Red" should look like this:
package policyabac.GET.api.projects.red

import data.officeManagement.isWorkingHoursWithTimezone
import input.user.attributes.properties as user_props

default allowed = false

default visible = false

default enabled = false

deviceAllowed {
	user_props.device == data.allowedDevices[_]
}

allowed {
	user_props.project == "red"
	isWorkingHoursWithTimezone
	deviceAllowed
}

visible {
	user_props.project == "red"
}

enabled {
  user_props.project == "red"
	isWorkingHoursWithTimezone
}
The second policy we'll create is similar, but it's going to add an additional rule that will make it more restrictive.
Under the src directory, create another policy called project-blue.rego, and add the following contents:
package policyabac.GET.api.projects.blue

import data.officeManagement.isWorkingHoursWithTimezone
import input.user.attributes.properties as user_props

default allowed = false

default visible = false

default enabled = false

deviceAllowed {
	user_props.device == data.allowedDevices[_]
}

locationAllowed {
	user_props.location == data.allowedLocations[_]
}

allowed {
	user_props.project == "blue"
	isWorkingHoursWithTimezone
	deviceAllowed
	locationAllowed
}

visible {
	user_props.project == "blue"
}

enabled {
	locationAllowed
	deviceAllowed
}
As you can see, this policy will only allow the user to access the resource if they are assigned to "Project Blue", are using an approved device and if they are in an approved location during working hours.
Update the .manifest file
We have some new roots in our data.json file that need to be added as roots to our manifest file, and so does our officeManagement package. We'll open src/.manifest and change it from:
[“policies”]To:
["policyabac", "allowedLocations", "allowedDevices", "officeManagement"]Commit the changes
Once you are done editing the policies, commit your changes, tag them, and push the changes to your repo:
git add .
git commit -m "Created ABAC Policy"
git push
git tag v0.0.1
git push --tags
Test the application
To test this application, you can choose to either run it locally or deploy it to Netlify. First, Retrieve the policy information from the Policies tab in the Aserto console.

To run or deploy the application, you'll the Policy ID, Authorizer API Key and Tenant ID.
Running the application locally
To run the application locally, you'll need to have Node.js and Yarn installed on your machine.
First, clone this repository:
git clone git@github.com:aserto-demo/aserto-react-abac.gitThen, cd in the directory you just cloned create a file named .env and update it with the values you retrieved from the console:
POLICY_ID=<Your Policy ID>
AUTHORIZER_API_KEY=<Your Authorizer API Key>
TENANT_ID=<Your Tenant ID>
POLICY_ROOT=policyabac
AUTHORIZER_SERVICE_URL=https://authorizer.prod.aserto.com
REACT_APP_API_ORIGIN=http://localhost:8080
Save then file, and run the following commands:
yarn install
yarn start:all
The application and server will start, and you'll be able to access the application at http://localhost:3000.
Deploy the application to Netlify
To deploy the demo application to Netlify, head on to this repository and click the "Deploy to Netlify" button.

In Netlify, copy the Policy ID, Tenant ID, and Authorizer API Key from the Aserto Console into the form.
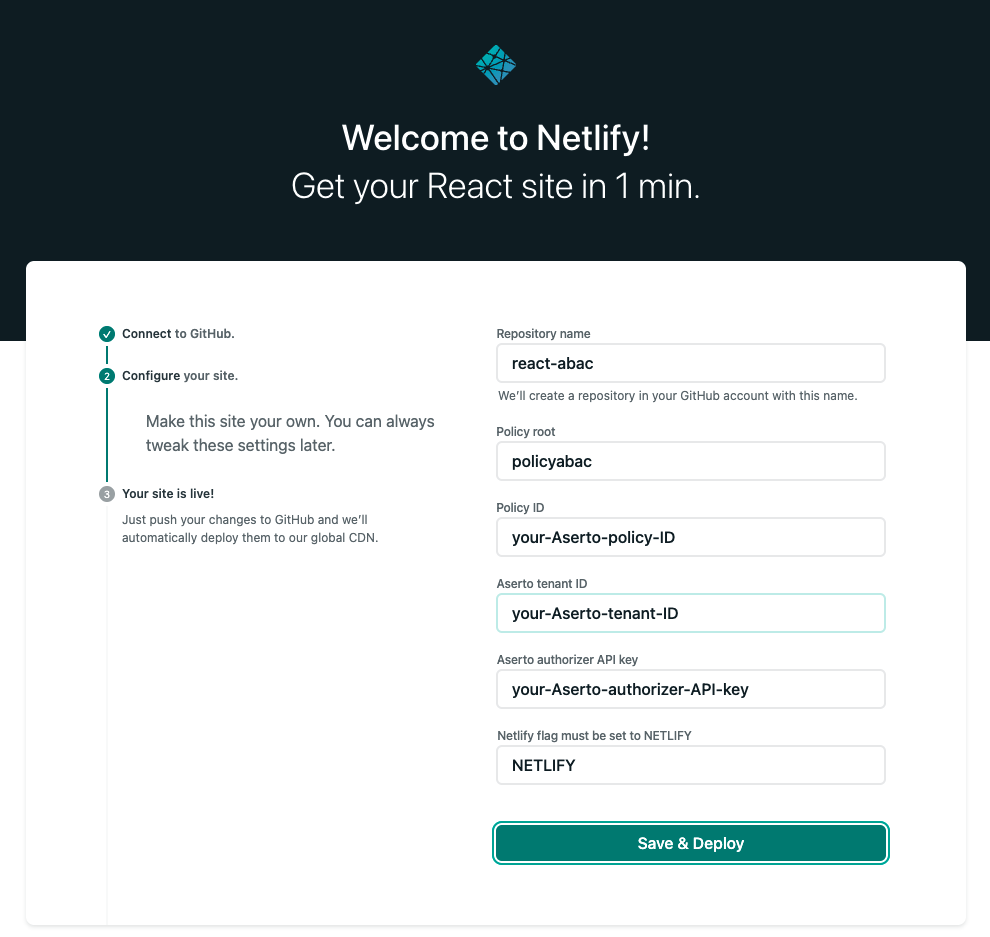
Finally, click "Save and Deploy".
Test the policies
Now, head on to the deployed application and login with the following credentials:
- Email:
euang@acmecorp.com - Password:
V@erySecre#t123!
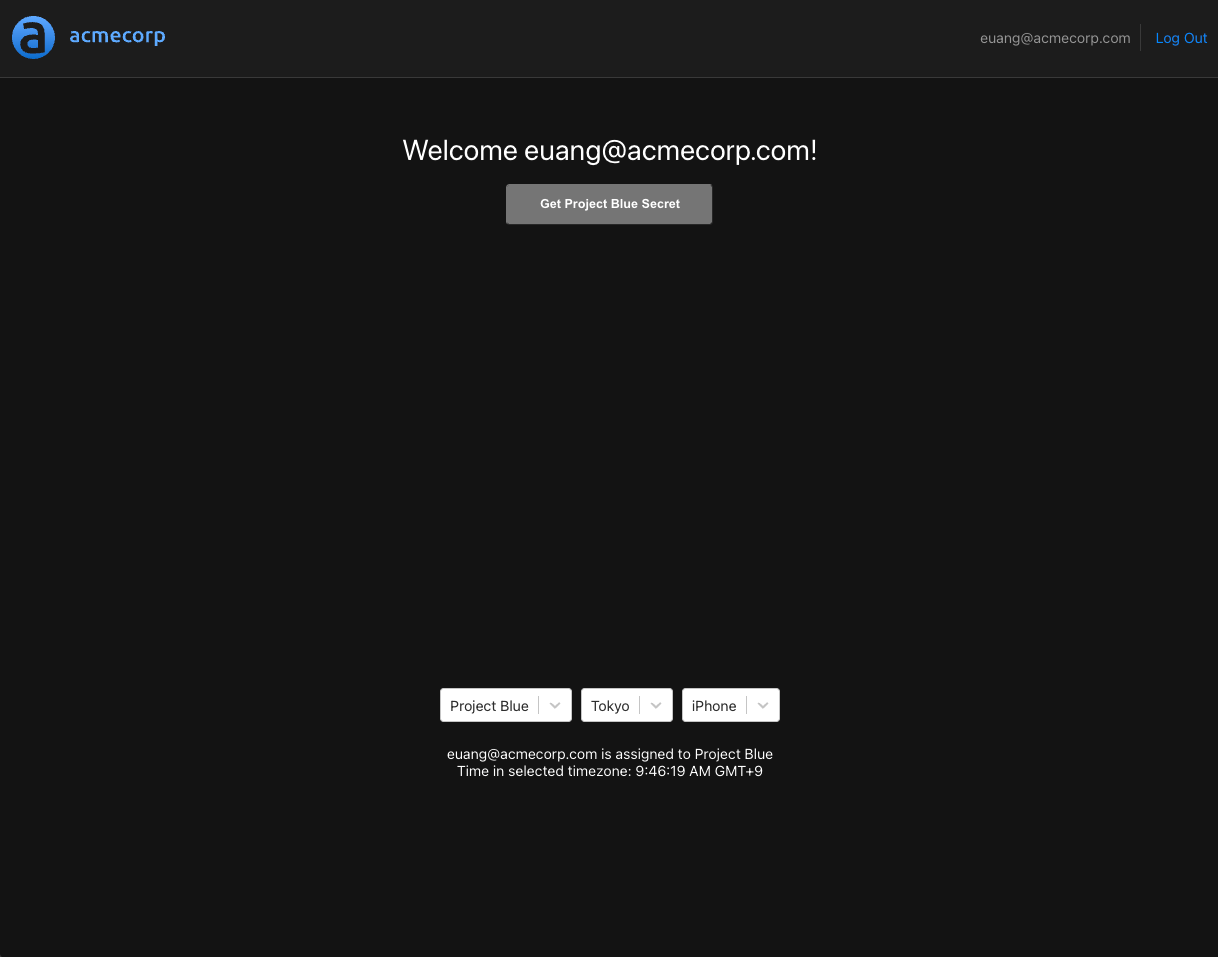
On the bottom of the screen, you'll see three drop downs which will allow you to select the user's assigned project, their location and the device they'll be using.
We'll start by selecting "Project Red" and "New York" - we'll hold off on selecting a device for now.
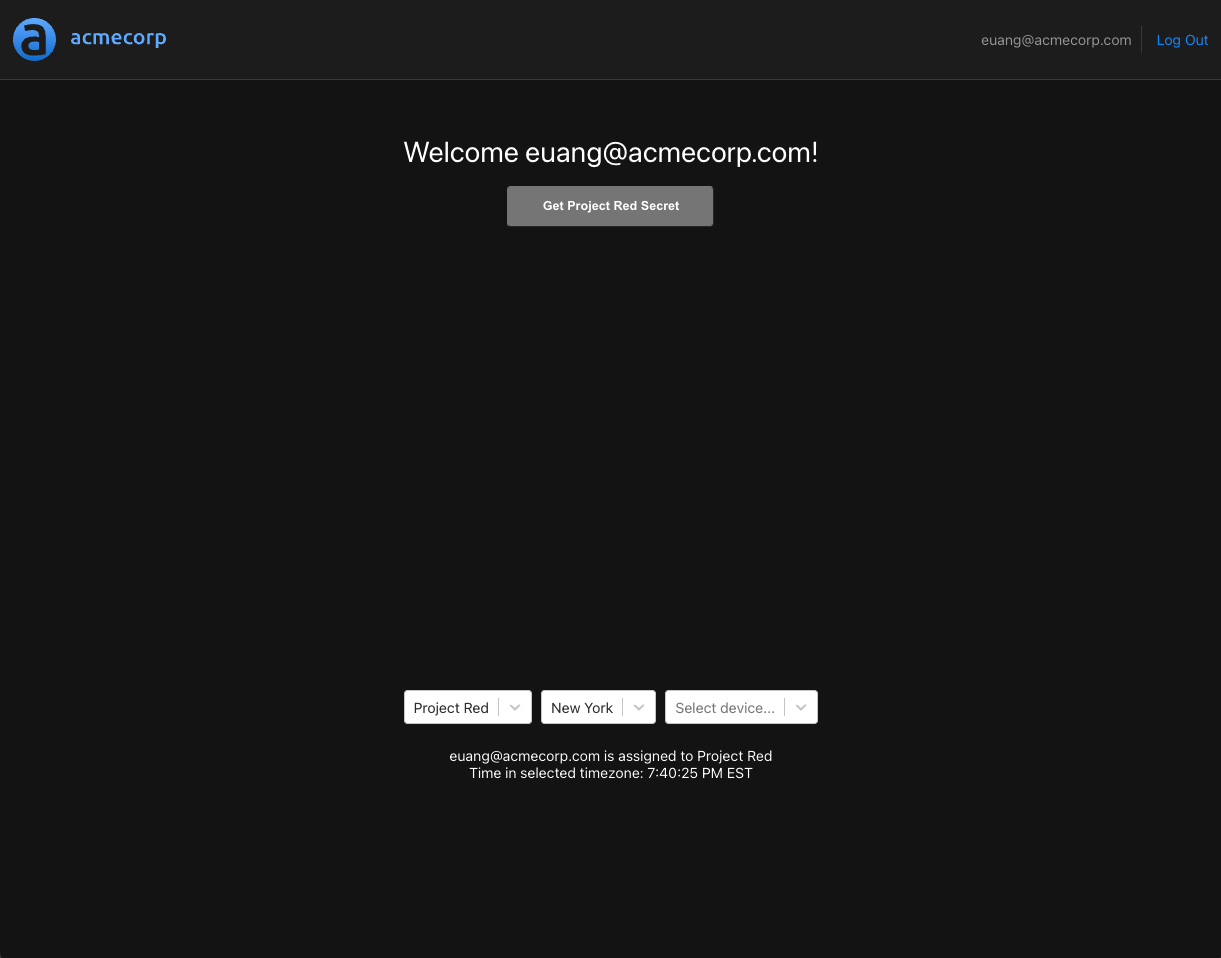
Since the current time in New York is 7:40pm PST, the button for access protected resources will be disabled - since our isWorkingHoursWithTimezone will evaluate to false for this project. If we select the location "Tokyo", the time will be within working hours, and the button will be enabled.

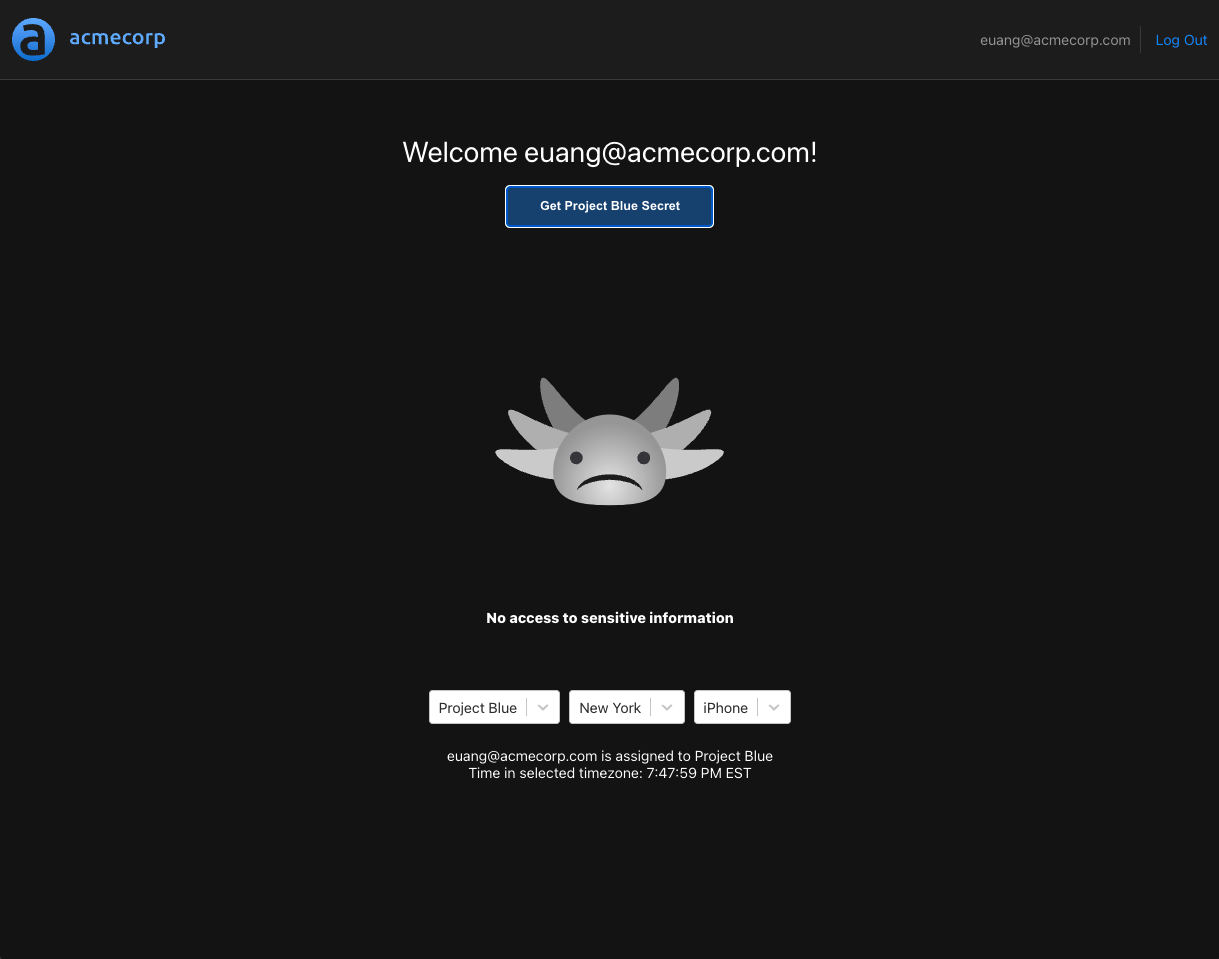
If we attempt to get the secret for "Project Red", we'll see the following:
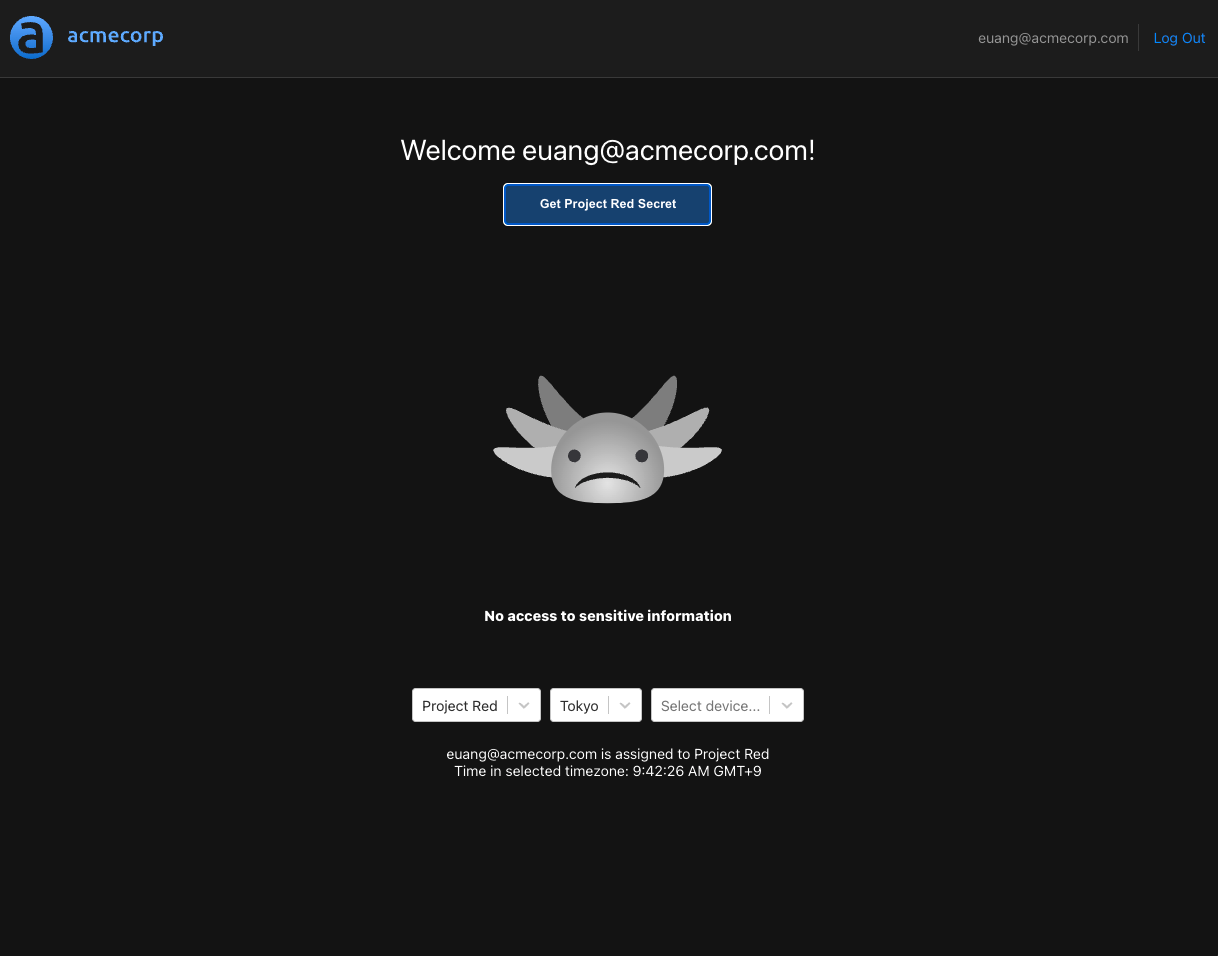
This is because we didn't select an allowed device for the user, which is required by the allowed clause for "Project Red". We'll select the "iPhone" device and try again.
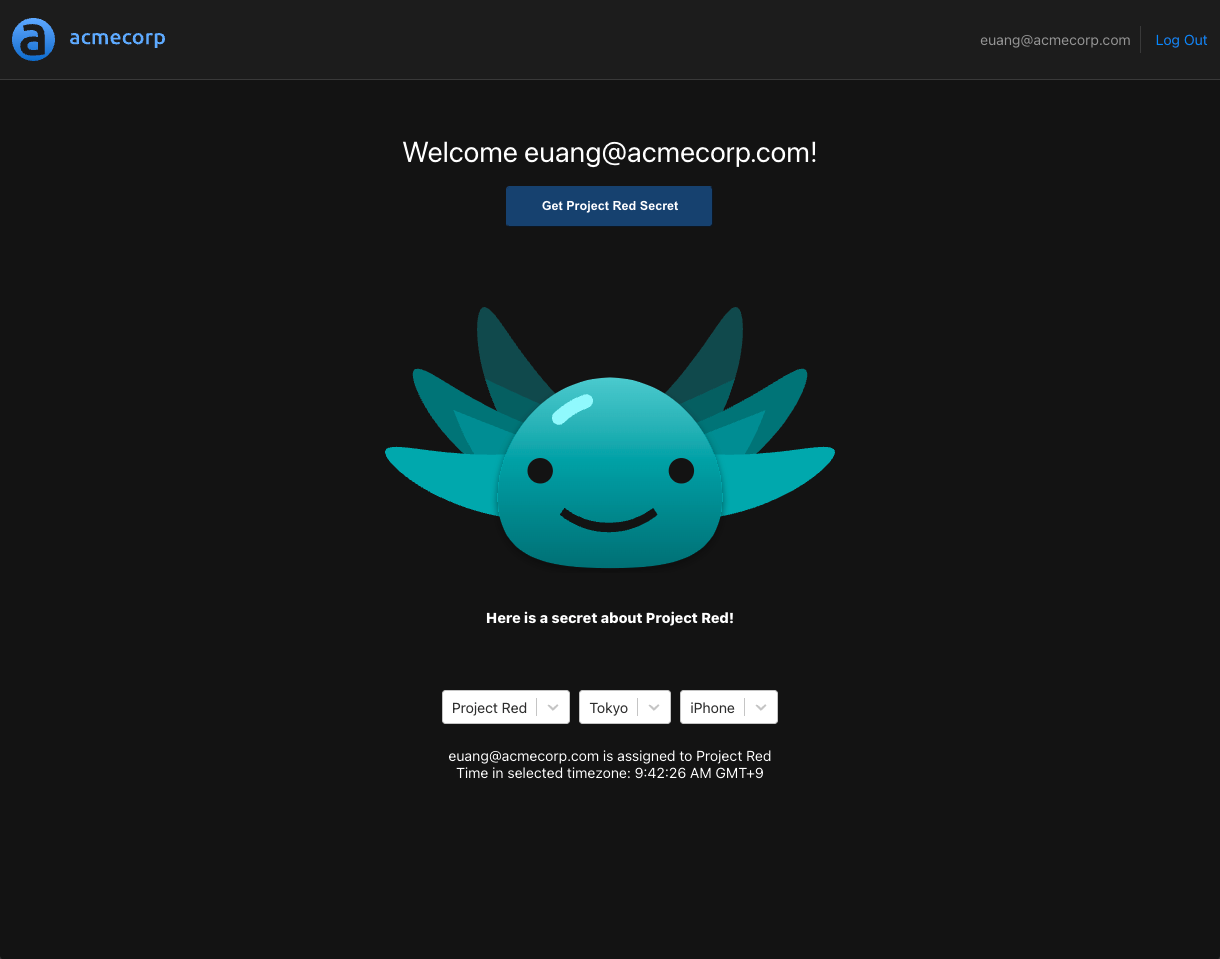
This time, we got the secret, since all the clauses evaluated to true.
Next, we'll switch to "Project Blue".
We can immediately see that the button for access protected resources is disabled, since the user is in Tokyo, which is not an approved location.
Switching back to New York will enable the button, since the policy for "Project Blue" doesn't require the user isWorkingHoursWithTimezone to be true for the enabled clause. But if we attempt to request the secret, we'll see the following:
This is because isWorkingHoursWithTimezone is part of the allowed decision for "Project Blue", and the user is in New York - a timezone that's currently outside working hours.
Finally, we'll select "Auckland", and attempt to get the secret again.
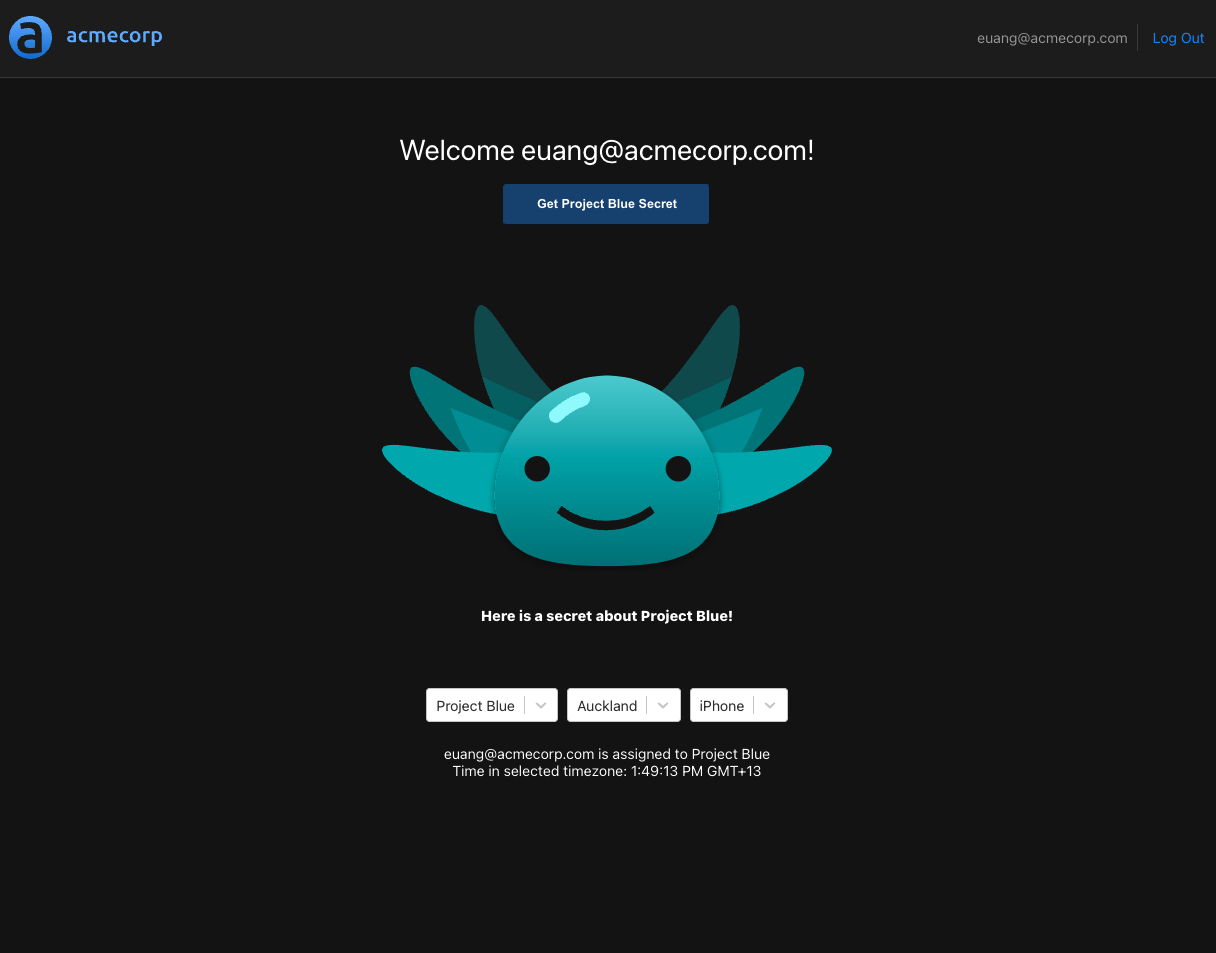
As expected, all the clauses are evaluated to true, and we got the secret.
Summary
Attribute Based Access Control is a way to achieve fine-grained and dynamic access control in your application. We learned how to create an ABAC policy that combined multiple user attributes to determine access to protected resources, and we saw how the policy controlled the behavior of the application. ABAC policies are especially useful when we try to enforce authorization rules on dynamic user attributes that change over time. In this tutorial, we demonstrated how to define policies that evaluated this type of dynamic user attributes. We hope you found this post helpful, and we'd to hear any comments or questions you have.
Roie Schwaber-Cohen
Developer Advocate
Related Content
Isn't authorization part of authentication?
Authorization and authentication are often mistaken to be interchangeable concepts. In this post, we clarify the difference between the two.
Jan 27th, 2022
Building RBAC in Node
If you're looking to implement RBAC with Node.js, there are many options to choose from. In this post, we'll review some of the existing tools in the Node.js ecosystem.
Feb 3rd, 2022

How hard can authorization be?
So you’ve decided to build authorization into your application. Sounds pretty straightforward, right? All it takes is a couple of tables in the database for roles and permissions, and we should be fine. Let’s take a deeper look at some design considerations you should be aware of from the get-go.
Feb 10th, 2022